Sunday, March 17, 2013

Crochet Wavy/Chevron iPad Mini Case Pattern

Crocheted by Dana, with Love!

This pattern was created as a gift for my fellow blogger, my sister, Megan.  She recently got an iPad mini and asked me to crochet a chevron style ipad mini case for it.  My pattern turned out looking more wavy to me than chevron, but I have thoughts about how to fix that.  I will include my ideas in the directions for you to try and decide what you like best.

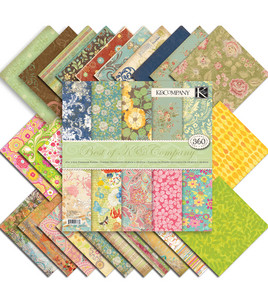
Yarn: I used a soft yarn designed for babies since it's what I had.  If you use a bulkier yarn, you will need to alter your gauge.  I used grey and pink yarns.
Hook: F

Use these dimensions to determine gauge:


Chain 31
Round 1: Sc in the 2nd chain from hook and in the next 27.  3 sc in the end chain, turning around the end to the other side of the chain.  27 sc along the other side.  sc in first st sl st to starting ch. (60 stitches counting ch 1 from starting chain)

Round 2: Ch 1. hdc. *3 hdc in the next ch. hdc. hdc3tog. hdc.* Repeat around. Sl st to ch 1.

Round 3-25: Repeat round 2, switching colors ever 3 rows (or as often as you prefer)

Row 26: Ch 1. turn. hdc. hdc2tog. hdc. *3 hdc in the next ch. hdc. hdc3tog. hdc.* 4 times. hdc. ch 1. turn.

Row 27-32: hdc in first 4 st. *3 hdc in next ch. hdc. hdc3tog. hdc.* 3 times. 3 hdc in next ch. hdc in next 4 st. Ch 1. Turn.  (continue switching colors as often as before)

Row 33: hdc in first 4 st. 3 hdc in next ch. hdc. hdc3tog. hdc. 3 hdc in next ch. hdc. sc3tog. hdc. 3 hdc in next ch. hdc. hdc3tog. hdc. 3 hdc in next ch. hdc in next 4 st. Ch 1. Turn.

Row 34: hdc in first 4 st. 3 hdc in next ch. hdc. hdc3tog. hdc. 3 hdc in next ch. hdc. sc3tog. hdc. 3 hdc in next ch. hdc. hdc3tog. hdc. 3 hdc in next ch. hdc in next 4 st. Ch 1. Turn.

Row 35: hdc in first 4 st. 3 hdc in next ch. hdc. hdc3tog. hdc. 3 hdc in next ch. hdc. dc. ch1. dc. hdc. 3 hdc in next ch. hdc. hdc3tog. hdc. 3 hdc in next ch. hdc in next 4 st. Ch 1. Turn.  (Button hole created)

Finish off.

Attach button.


I added a cat button to the front for decoration =)

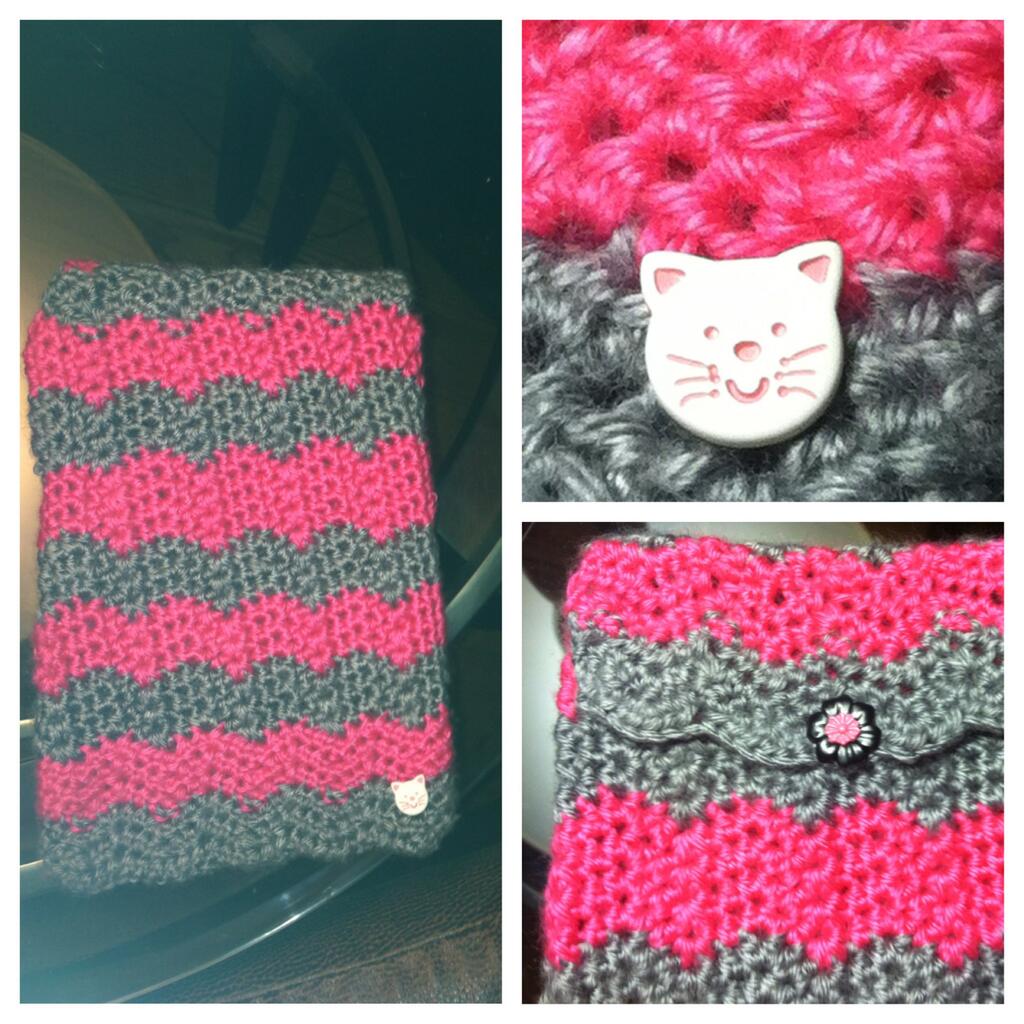
In order to give the pattern more of the zigzag feel of chevron, you may consider using: *hdc, dc, hdc in one st; hdc; sc3tog; hdc* as the repeating pattern.  I did not use this modification so I'm not sure how much of a difference it would make.  I thought of it half way through so I continued with the all hdc route and we decided we liked to finished product enough that I didn't bother creating a second.

Enjoy!

Monday, December 10, 2012

Swirl Christmas Ornaments

 Made by Megan, with love!

It's almost Christmas and we are SO EXCITED!

Since our sister Karla just had the premature twins that Dana talked about in her previous post, she and her husband have been very, very busy and I have been lucky enough to be able to watch her oldest, Logan! My precious nephew is almost 2 years old, and he loves to help everyone with everything all the time! My mother and I thought it would be a good idea to have Logan make his Mommy and Daddy a homemade Christmas present! We were trying to think of something fun for him to make that Karla would actually appreciate having. So, naturally, I went straight to my favorite website, www.pinterest.com.

I found something on Pinterest kind of similar to what we ended up doing with Logan. It was about painting the inside of a clear glass Christmas bulb to hang on the tree. So I just took this idea and made it little-boy-friendly! I'm sure someone else has thought of this before, but I thought it was pretty clever...

All you will need is:
  • Clear Christmas ornaments (we used plastic bulbs for obvious reasons)
  • At least 2 Acrylic Paints of any color
  • Masking Tape
  • Newspaper or old towels (to cover the table)
  • Black Permanent Marker
Optional supplies:
  • Isopropyl Alcohol (aka rubbing alcohol)
  • Cotton Balls (one per ornament)
  • Long Tweezers
These are so easy to make, and my nephew had so much fun! That is, until he saw the cat and got really distracted. Aunt Megan ended up doing 4 out of the 5 ornaments. We got Logan to at least do a little bit of each, however, so we could still say they were from him. Details...

Just follow these steps:

Optional:
  1. Pour some Alcohol into the bulb to clean the inside. This will help the paint stick to the surface better than if it was dirty. Swirl around the alcohol, then pour the rest out.
  2. Let it dry for a little bit on its own, blow in it, then realize this will take forever and shove one cotton ball in the ornament. Give it a good shake then let the cotton ball sit for a little while and it will eventually dry out the inside of the ornament. (This is what worked for me. Letting them dry on their own would work just as well, I'm sure)
  3. Use the tweezers to remove the cotton ball from the ornament.
Actual Process:
  1. Write whatever you would like to write on the ornament with a black permanent marker. I wrote the names of my niece and nephews, my sister, and her husband. Then I wrote "2012" on the opposite side.
  2. Once the marker has totally dried, Choose 2-3 colors of Acrylic Paint to use in your ornament. I wouldn't go more than 3 because your colors would start to blend together and make an ugly brown color.
  3. Set the top hooky thing to the side. You won't put these back on for a few days until you are sure your paint has totally dried!
  4. One color at a time, squeeze a decent amount of paint into the opening of the ornament. Try to get a little bit on different sides of the ornament, not just plopped down in the bottom. 
  5. Cover the opening with masking tape.
  6. SHAKE! You really need to shake it a lot until the paint has spread around inside the bulb and there are no huge globs anymore.
  7. Lift the masking tape and add your next color. Repeat steps 4-6. It is okay if there are clear spaces! If you shake it to much your colors will start to blend a little, and we don't want that.
  8. Add another color if you would like! I did 2 colors in a few and 3 colors in the others. They both look really nice.
  9. If there are big blank spots that you want filled in, add a little drop of any of your colors in that area and shake until it is just covered. While your ornaments sit to dry for a few days, those little gaps will most likely fill in. Mine did.
  10. Sit them upright to dry (I put mine in plastic cups so they couldn't roll).

And you're done!! These are so easy and they turn out so so so cute! They are really cheap, too! The bulbs were about $1.50 each and the paint was maybe $2.00 each. I had all the other supplies. I loved this project so much! I will definitely remember this DIY craft for the future. They are a cute gift for anyone at any age. LOVE!

Sunday, December 2, 2012

3.5 lb Premie Baby Beanie

Crocheted by Dana, with love!

My niece and nephew (twins) were recently born 2 month premature.  Everyone is fine, but they will be in the NICU for a while.  Their mom (one of my sisters) asked me to make them some beanies.  I found a premie hat pattern on Ravelry.com  that was apparently for a tini tini tiny baby and never would have fit these guys.  My niece is now 3 lb 1 oz and my nephew is 3 lb 8 oz.  I modified the original pattern (found here) to make these beautiful beanies for the babies.

Supplies:

Lion 73111 Crochet Hook-Size G6 4.00mm Purple (Google Affiliate Ad)


Caron 339844 Simply Soft Brites-Watermelon (Google Affiliate Ad)
(Choose any color, of course.  Other brands are fine, but make sure they are baby soft)

Abbreviations:
ch = Chain
sc = single crochet
dc = double crochet
slst = slip stitch

Crochet Instructions:
Chain 3
Round 1: 12 dc in 3rd chain from the hook.  Join with slst to top of beginning ch 3.
Round 2: Ch 2. Make 2 dc in each stitch around. Make 1 additional dc in the last stitch next to first ch 2.  Slst to top of ch 2.
Round 3: Ch 2. Make 1 dc in the next stitch, 2 dc in the next st. Continue alternating 1 dc, 2 dc, 1 dc, 2 dc, etc. around to starting ch 2.  Slst to top of ch 2.
Round 4: Ch 2. Make 1 dc in each stitch around. Slst to the top of ch 2.
Round 5-9: Repeat round 4.
(Optional Round 10: Slst or sc around (loosely, as to not make the hat too tight to pull over baby's head.  I did not do this, but if you do not feel the hat looks finished enough after round 9, this may be for you)
Tie off and weave in ends.

Allison and Chase love them =)

Monday, October 1, 2012

Tile Coasters

Made by Dana and Megan, with love.

Dana's Story:
My best friend for over a decade recently moved with her boyfriend to a new apartment.  I wanted to give them a home-warming gift to celebrate.  I noticed that they had a set of four coasters.  Although they were nice, they were quite plain and had to be carried from room to room as it was their only set.  I found this awesome post on Pintrest and knew instantly that this was it!  I made four for her (ideally for the living room) and four for him (for his gaming room).
We used a slightly different technique for each set.  One set, we simple used a patterned scrapbook paper and used a solid colored card stock for the boarder.  Since the design of their home is very clean-cut and modern, we chose to go along with their color scheme and use a shiny silver floral scrapbook paper with a maroon boarder.  This combination looked so classy and sharp.  On the other set, we cut shapes out of card-stock using an X-acto knife to form characters and layered the shapes to get the desired look.  I thought that since her boyfriend loves to play video games (we're kind of a nerdy bunch), we would make him coasters with four of the cutest Pokemon characters out there!  It took a long time to get the characters to look just how we wanted.  Being the picky, perfectionists we are, we think that a great outcome is worth the time and effort!  It would have been so much easier if we could have just printed a picture from the internet and plopped that on the tile and called it a day.  However, I read somewhere that if you use a picture with ink, the ink could smear.  Plus, that's boring!  Don't be a afraid to get creative, people!
So here is everything you'll be needed to create these adorable coasters:

Supplies
Mod Podge


*Matte or Gloss non-outdoor Mod Podge will also work, but outdoor provides extra waterproofness (if that's a word!)

Acrylic/Polyurethane Spray (Clear and Water-resistant)


Scrapbook paper/Card Stock


Character picture


Sponge brush


Felt Pads


X-acto knife


Cutting board


Pencil


Sharpie Permanent Ink Pen - Fine Point Black


Scissors


Tracing Paper


Glue stick/tape


Ceramic Tiles 4" x 4" (duh! we almost forgot this!)


Procedure

1a) Prepare your paper (scrapbook paper)


  • If you are using a patterned paper as your design, draw the outline of the tile on the back of the paper.
  • Cut the paper out, slightly smaller than the line.  *If you plan to add a boarder, you may want to crop the paper a little bit smaller, still.
  • Boarder: Draw the outline of the tile on the back of the paper.  Cut out the paper the exact size as the top of the tile.  Determine how thick you want the boarder to be (we chose 1.5 cm).  Measure the distance in and excise the middle with an X-acto knife (don't forget to cut on your cutting board!) leaving the boarder in one piece.
1b) Prepare your paper (image)
  • If you are creating a character/object on your tile, print out the character.  I found a coloring page of the characters we used for free online.  These are perfect for tracing.  Save the picture to your computer.  Paste the image to a word document.  Crop off as much white space around the character as possible.  In image properties, make the longest part of the character (either height or width) no larger than 3.5".  This size fits nicely on the tile while leaving room around the character.  Print the image.  Place tracing paper on top of the printed image and trace.  
  • Next, it is time to cut out some pieces.  For the Pikachu™, we cut out the yellow shape of the body by placing the tracing paper on top of the yellow card stock and cut through both papers with the X-acto knife.  If you would prefer, you may want to cut the traced outline out with scissors, retrace it onto the card stock, and then cut the shape out of the card stock.  The first method is faster, but the second is a little easier (we did it both ways, actually). 
  • Once you have the main color piece, begin cutting out the details. At this point on the Pikachu™, we cut out the black tips of the ears, the striping on the back that is visible on the side, the color detail on the base of the tail, the cheeks, the mouth, and the eyes.  These will be layered on top of the base color. 
    • For another look, try cutting the shapes for the accents out of the base piece and putting the desired color underneath to make it peak through.  We did this for the mouth piece to make it appear set back.
    • Cut the paper to go under the main piece a little larger than the cutout.
    • Glue the accent paper onto the bottom of the main piece.  (Having pieces attached before added them to the tile will make life easier)
  • Use a marker to draw details, like the separating line that separates the arm from the head and tail on Pikachu™.  We also, very carefully, outlined the entire body of the characters by touching the marker to the edges of the paper cutouts.
2) Mod Podge  
  • Dip your wedged, foam brush into the mod podge (you may want to pour some into a disposable cup). 
  • Brush a thin, even layer onto the tile. 
  • Lay the paper onto the tile.  Important: You have just a few seconds to adjust the paper, but try not to shift it too much or you will see unevenness in your mod podge.
  • Smooth out the paper as well as you can by pressing down lightly with the tip of your X-acto knife or tweezers on in order to eliminate air bubbles.  You can also pop them with the point of your knife before it starts to dry.
  • Let dry 15-20 minutes (as instructed on mod podge bottle).
  • Paint on another layer of mod podge onto the tile and on top of the image in smooth, even strokes.  
  • Continue to add layers of mod podge, allowing them to dry in between. 
    • If you have a lot of accent pieces, you may want to add only a few each layer.  This is easy as the mod podge will dry too quickly to add several little pieces.
  • Add at least 5 layers total.  We did several extra for good measure.
  • Note: The direction you paint the mod podge matters! Streaking will be visible once the mod podge hardens.  If you want the lines in one direction, be sure always paint the mod podge in the same direction, either up and down or right and left.  If you go both ways, the finished product will still look great, but different.  We went in one direction only on one set and both directions on the other.  Both ways look good.
3) Acrylic Spray
  • After several layers of mod podge and drying over night, spray the acrylic sealer onto the tiles.  On the spray we used, the instructions on the can said to spray in even, slightly overlapping lines from left to right.  Basically, spray even lines, and not all willy-nilly.  The smell of paint was pretty strong so make sure you are well ventilated (ideally outside).  
  • Apply a couple coats, allowing for drying time in between.  
4) Felt Pads
  • Once the tiles are dry, flip them over and stick four felt circles onto the bottom, one on each corner.
5) Dry
  • Give the tiles several days to really settle (and stop smelling like acrylic) before you use them or give them as a gift.  Then, enjoy your beautiful new coasters!
    • The second picture didn't come out too well.  The boarders are maroon with a mirror-like center with a painted-looking flower pattern.


My friends loved their gifts and were very impressed!  They receive plenty of compliments from friends and family.  This project was so much fun that we can't wait to make more.  We hope you enjoy making your own personal coasters!

Click here for original Pintrest post link


Friday, September 14, 2012

Candy Wrap-Ups Recipe

Quality Time with Grandma and Nana

Baked by Dana and Megan, with love!

On Wednesday, September 12, we had a very special occasion that called for a very special dessert.  Our Nana had flown in from California to visit family here in Ohio, and we decided that it would be really special if we could take both of our grandmothers out to dinner together!  We rarely get to see our Nana, but she and our Grandma write letters to each other all the time, so they're long-time friends.  We are so blessed to have the grandmothers we do.  They are the sweetest women on the planet, and are always there for us whenever we need anything.  So after we took them to dinner, we all went back to our parent's house to spend some more time together over coffee and cookies.  Our Nana loves to take pictures, and loves to show them off even more, so we all got to look at many pictures of our California family that we haven't seen in years.  It's crazy how quickly things change, being that the last time we were all together was over 10 years ago.  It was so nice having her here with us, and we miss her already!

Since everyone was coming back to the house to visit, we thought: "We need to make something blog-worthy!"  We searched the internet for a spectacular dessert that wouldn't take too long to make, being that we only had about 3 hours to bake it.  We stumbled across a few great cookie recipes, but decided on Candy Wrap-Ups! (We came up with this name because we kind of didn't like the name it previously had.."Bikini Killers" didn't sound very appealing.)

This whole process was certainly interesting.  It seemed something different went wrong for each batch, but luckily we could still serve them all (except one...we forgot to set a timer. Oops!).  We made some alterations to the original recipe we found, so we're going to write the ingredients and directions the way we did it.  So with no further adieu, here is the recipe for Candy Wrap-Ups!

Ingredients:
  • 2 cups all purpose flour
  • ½ tsp baking soda
  • 16 tbs (2 sticks) unsalted butter
  • ¾ cup brown sugar
  • ½ cup granulated sugar
  • ¾ tsp salt
  • 2 tsp vanilla extract
  • 2 large eggs
  • 1 cup chocolate chips
  • ~12 mini Snickers bars
  • 2 Reese's Chocolate Bars (this equals 12 sectioned pieces. We used this because it is not as big as a normal Reese's cup, but slightly bigger than a mini cup. It fit perfectly inside a cookie!)
Directions:

1. Preheat over to 375 degrees F.
2. Combine flour and baking soda in a small bowl. Whisk together and set aside.
3. Place 10 tablespoons butter in 10-inch skillet over medium-high heat until melted.  Use the handle of the pan to swirl the butter around in the skillet.  Swirl butter constantly over the heat until it becomes a dark golden brown in color and gives off a nutty smell.  (This part seemed to take forever! We had never browned butter before and weren't quite sure what would happen. It was difficult to see when the transparent yellow of the melted butter turned brown against the black, nonstick surface of the skillet. The smell will be the first to change.) Remove skillet from heat and transfer browned butter to large heatproof bowl.  Stir the remaining 6 tablespoons of butter into the hot butter until completely melted.
4. Add granulated sugar, brown sugar, salt, and vanilla to brown butter mixture and whisk until fully incorporated. Add eggs and whisk until the mixture is smooth with no sugar lumps remaining.  Rest mixture for 3 minutes, then whisk for another 30 seconds.  Repeat process of resting and whisking 2 more times until mixture is thick, smooth, and shiny.  
5. Using a rubber spatula or wooden spoon, stir in flour mixture until just combined.  Stir in chocolate chips.
Bottom Row: flattened disks of dough
Middle Row: Candy placed on disks
Top Row: Dough wrapped around candy
6. Using a cookie dough scooper (which is a smaller version of an ice cream scooper), scoop about two tablespoons worth of dough into a ball.  Next, flatten ball into a circle.  Place one Reese's square or 2 slices of snickers in the center of the disc, and wrap the dough around the candy.  Be sure to seal the dough completely or candy may leak out while baking.
7. Sprinkle chopped Reese or Snickers on top of the cookie to be able to tell them apart and for added flavor. (we found adding finely chopped snicker pieces to the top of the warm cookies right after they come out of the oven made for a more attractive topping. Baking the cookies with the toppings already on caused them to melt and no longer be recognizable as Snickers.
8. Line cookie sheet with parchment paper, unless you are using a non-stick cookie sheet.  Bake for 10-12 until golden brown (edges will be darker than the center which should still be soft).
9. Cool on a wire cooling rack.

So that's it!  All together, this whole process took us about 3 hours, including shopping.  Since we already had a lot of the ingredients, it really didn't cost us that much, either!  Everyone seemed to like the cookies...except for Megan!  She always uses the same chocolate chip cookie recipe, so browning the butter was a new taste.  It adds a unique nutty flavor to the dough.  Dana loved it, but if you like more of a traditional chocolate chip cookie, Megan would recommend the good old Nestle recipe on the back of the semi-sweet chocolate chip bag!  Maybe next time we make these wrap-ups, we will try it with the Nestle recipe, and maybe with different chocolate candies!

We hope you enjoy this recipe and have fun making it your own like we did!

Monday, September 10, 2012

"Boyfriend" Cookies

Baked by Megan, with love!


As boys are very well known for eating...and eating...and eating...there is no better name for these cookies that include an extreme amount of chips, candies, and special treats!  These cookies are perfect for a thank you gift to the boy who helped paint your bedroom (which is why I made them), for trying to impress a guy with your incredible baking skills, or just for your own enjoyment!

Ingredients:
  • 1 cup butter - softened
  • 3/4 cup brown sugar - packed
  • 1/4 cup granulated sugar
  • 1 package (3.5oz) instant vanilla pudding mix
  • 2 eggs
  • 1 tsp vanilla extract
  • 2 1/4 cups all-purpose flour
  • 1 tsp baking soda
  • 1 cup semi-sweet chocolate chips
  • 1 cup milk chocolate chips
  • 1/2 cup white chocolate chips
  • 1/2 cup peanut butter chips
  • 1/2 cup M&Ms
  • 1/2 cup Reese's Pieces
Directions:
  1. Preheat your oven to 375 degrees F (190 degrees C)
  2. In a large bowl, cream butter, brown sugar, and granulated white sugar
  3. Mix in vanilla pudding mix, eggs, and vanilla extract
  4. Combine flour and baking soda in a separate bowl, then add to the mixture
  5. Put all chocolate chips and candies into a bowl and mix together to make sure each cookie will have a good variety of treats
  6. Add chips and candies to the mixture
  7. Drop tablespoon sized balls of dough onto an ungreased baking sheet
  8. Bake for 10 to 12 minutes or until golden brown
  9. Cool on a wire cooling rack
Notes:
  • I only found 3.4oz packages of pudding mix, and that was just enough!
  • Add the pudding mix as the powder! Do not prepare the actual pudding.
  • I bought a bag of peanut butter and milk chocolate chips mixed together to save some money, and I just used 1 cup of that mixture and 1 cup of semi-sweet chocolate chips.  This equaled approximately 1 1/2 cups chocolate and 1/2 cup peanut butter which was plenty.
  • I would always recommend stirring with a rubber spatula or wooden spoon instead of using a powered mixer.  Yes, it is much easier and faster, but the texture of the dough may be too soft if you use a power mixer.
  • Click here to see the recipe source.
My boyfriend has always been one for plain chocolate chip cookies and would always choose them over anything fancy.  However, he really loved these cookies, and so did his whole family!  They tasted so good, and I really love what the vanilla pudding mix added to the recipe.  Baking is a passion of mine, and I am very critical of how my products come out.  Thankfully, these cookies were pretty easy to make and each batch came out great!  If you have a sweet tooth, these are definitely the cookies for you.  There was just the right amount of peanut butter, chocolate, and crunch from the candies!  Give them a try and let me know how you liked them!  Also I would be happy to read your comments and answer any questions you may have as best as possible.  I hope you enjoy this recipe as much as I did!